

Welcome to our tapirs' home!
We had made significant progress, by creating the blog with latest version of GatsbyJS. GatsbyJS recently upgraded to v5 few weeks ago. In this post we will write down the steps on how to start your blog with GatsbyJS with TypeScript... and MDX.
What is MDX? Well, it is a markdown extension that allowed you to insert JSX element and css styling to markdown files, which might be useful if you want to insert interactive into your markdown document. But the tradeoff will be slower down the build time.
In this post, I assume that you might be familiar with
- TypeScript
- ReactJS
If you have not learn these before. Don't worried, you can still create your own gatsby blog by following the steps in this article.
Create new gatsby site
First off, you need to install the gatsby-cli in your local environment.
You can refer to the official site on how to setup gatsby-cli. For myself,
I installed it globally in my WSL2 Ubuntu 22.04:
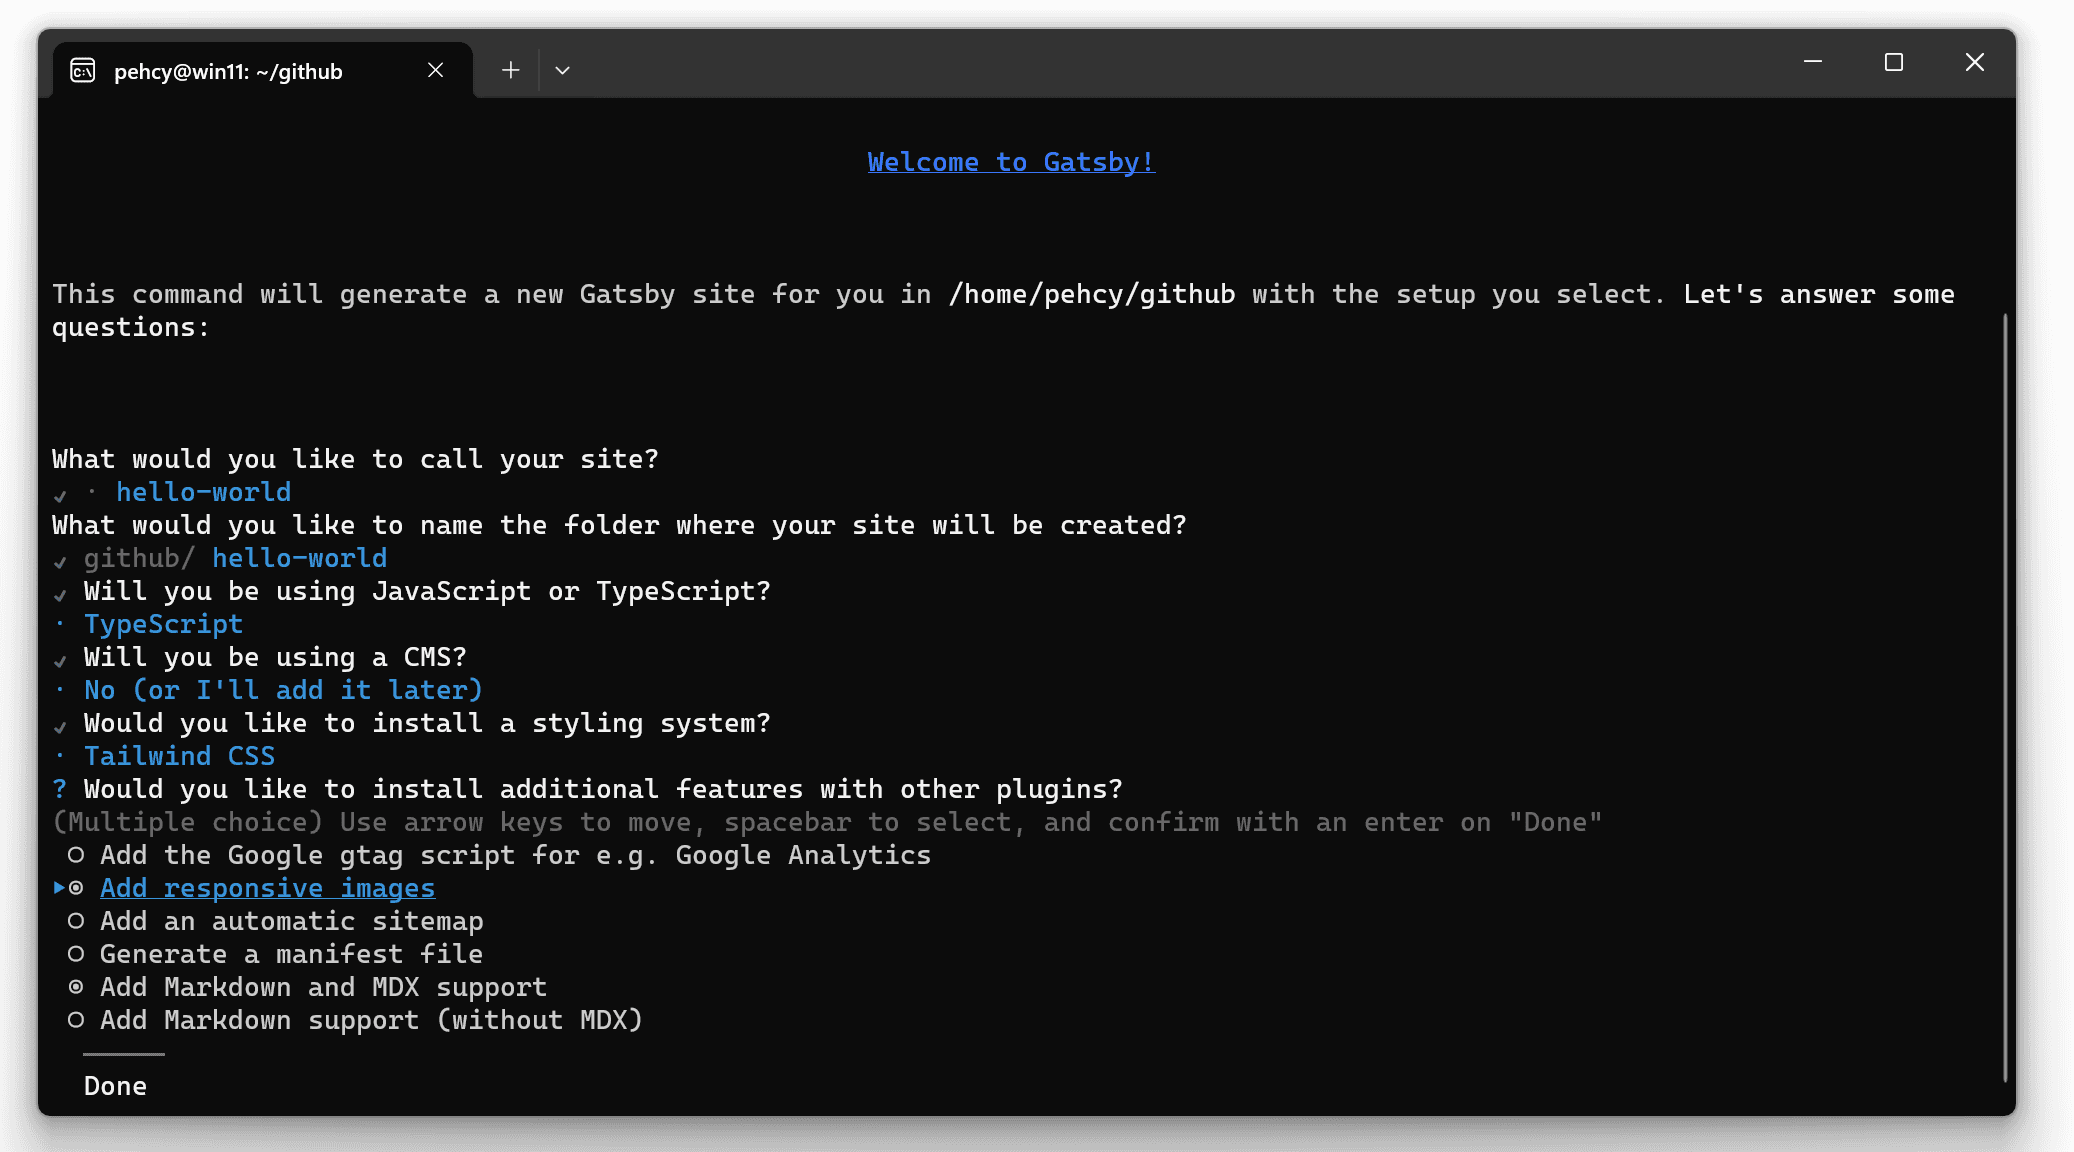
npm install -g gatsby-cliOnce installed, you can now generate a starter gatsby blog in CLI. Good things is that it now ask whether you like to install any gatsby plugins. (I remeber those days I had to setup tailwind css myself, sometimes no luck and raised bunch of dependencies errors.) Name your project whatever name you like, and follow the choices as below:
Next, we are going to navigate the hello-world project. You can now
start local server by running npm run start, then go to
localhost:8000 in your favourite browser.
cd ./hello-world
npm run start   # or `gatsby start`
Note that for the last section, the tag "Add Markdown and MDX support" must be ticked for MDX. If you missed this you have to install these MDX dependencies by yourself,
npm install --save gatsby-plugin-mdx @mdx-js/mdxAlso, you might need to install the plugin gatsby-remark-images, this plugin will
load your image responsively with Javascript at the background.
npm install --save gatsby-remark-imagesAdding MDX posts to your gatsby site
Now, proceed to hello-world project. You will notice that some folders are already
prepared in the project.
In src directory, create a new folder called posts. This folder storing all your mdx
files, including any image you like for your blog.
In posts, add new folder named post1, this will be the first MDX blog post for your website.
When you want to create a new post, you just create a new folder with your post title. And,
the mdx file inside this folder must named as index.mdx. Here we gonna
create a new post named post1 with Lorem Ipsum:
mkdir -p ./src/posts/post1
nano ./src/posts/post1/index.mdx
---
date: 2023-12-23 01:00:00
title: My first blog title
author: Tapirs
---
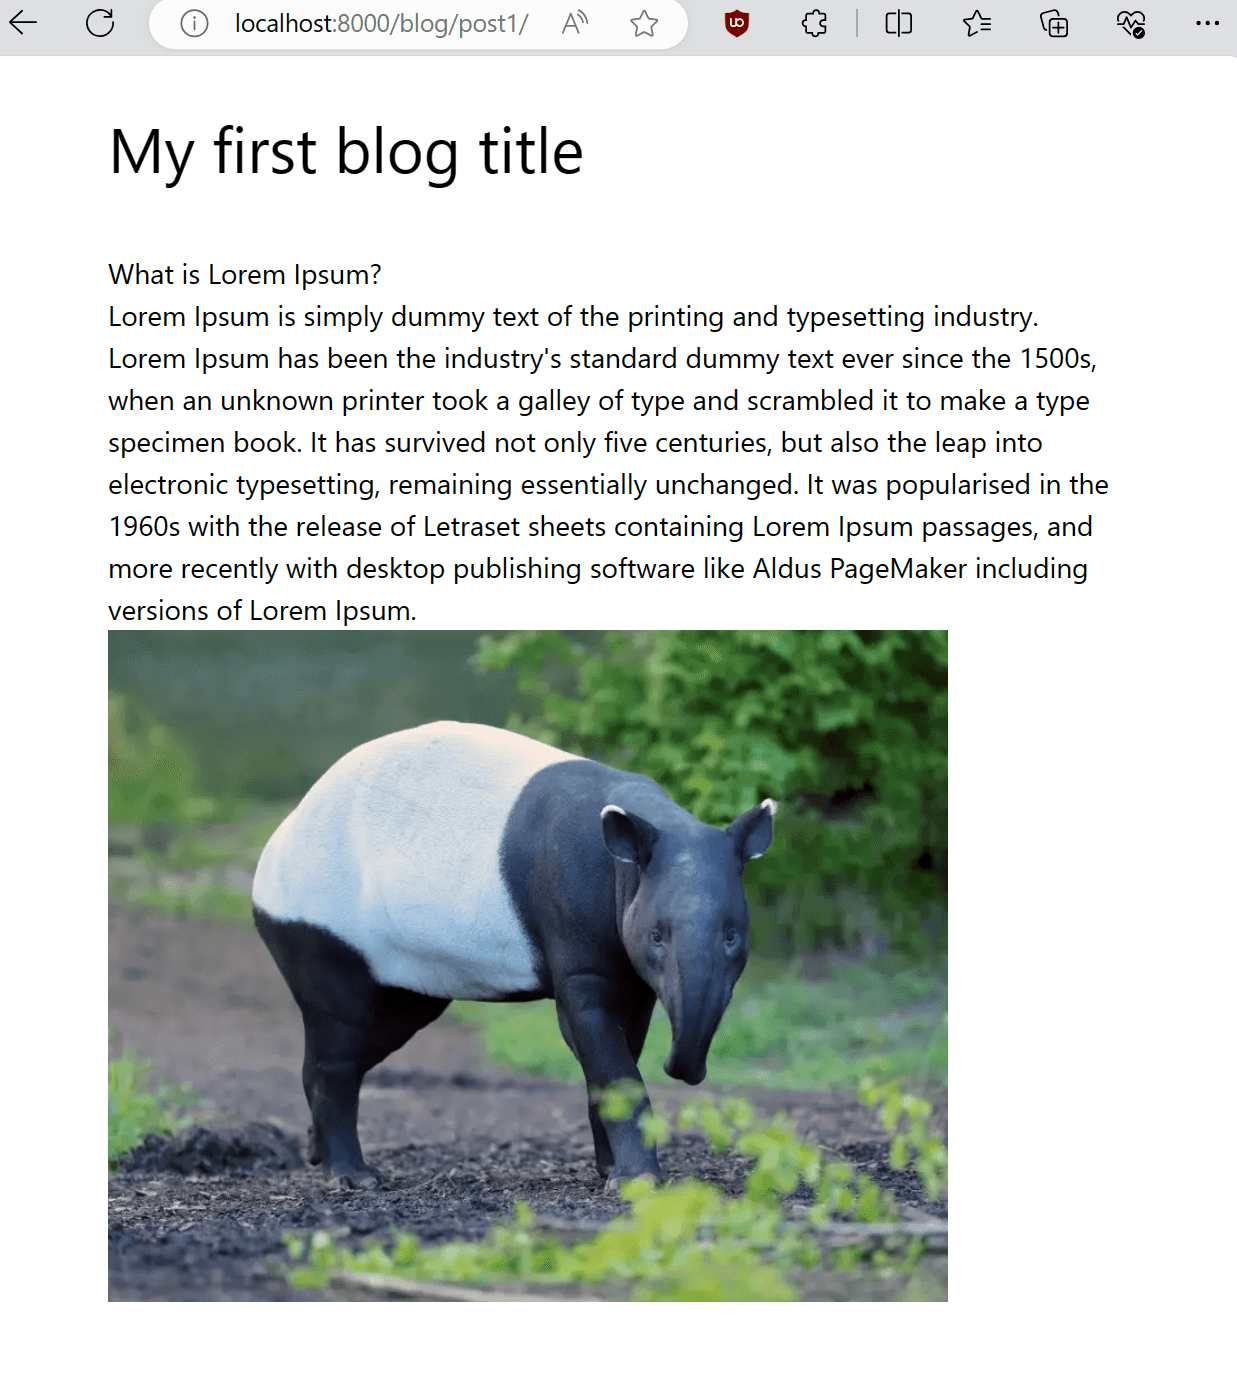
# What is Lorem Ipsum?
Lorem Ipsum is simply dummy text of the printing and typesetting industry.
Lorem Ipsum has been the industry's standard dummy text ever since the 1500s,
when an unknown printer took a galley of type and scrambled it to make a
type specimen book. It has survived not only five centuries,
but also the leap into electronic typesetting,
remaining essentially unchanged.
It was popularised in the 1960s with the release of Letraset sheets containing
Lorem Ipsum passages, and more recently with desktop publishing software like
Aldus PageMaker including versions of Lorem Ipsum.
<img
src="https://s3.animalia.bio/animals/photos/full/1.25x1/shutterstock-1976559332jpg.webp"
width="480"
height="200" />create another second post neamed post2 with the same index.md file. It is up to you
if you like to change content for the second post.
mkdir -p ./src/posts/post2
cp -r ./src/posts/post1/index.mdx ./src/posts/post2
and include this posts folder in gatsby-config.ts as well. This
file contained the configurations for your gatsby plugins. Fat chance is that you will come
to update this file again when you had installed any plugins in the future.
const config: GatsbyConfig = {
  "plugins": [
    // ...
    //
    // ↓ Add This few lines
    {
      resolve: 'gatsby-source-filesystem',
      options: {
        name: "posts",
        path: "./src/posts"
      }
    },
    {
      resolve: "gatsby-plugin-mdx",
      options: {
        gatsbyRemarkPlugins: [
          {
            resolve: 'gatsby-remark-images',
            options: {
              maxWidth: 640
            }
          }
        ]
      }
    }
    // ...
  ]
}
Template For blog page
We will be adding another dicrectory called template inside src, and in
this directory we have to create another tsx file called blogPostTemplate.tsx.
This will be the template for our blog pages.
In blogTemplate.tsx, copied the following script:
import { MDXProvider } from '@mdx-js/react';
import { graphql, PageProps } from 'gatsby';
import React from 'react';

const BlogPostTemplate: React.FC<PageProps<Queries.BlogPageQuery>> = ({
  data,
  children
}) => {
  return (
    <main className="h-full flex flex-col">
      <div>
        <div className="relative container max-w-5xl mx-auto p-8 flex flex-col">
          <h1 className="text-4xl mb-8 font-bold sm:text-3xl">
            {data.mdx?.frontmatter?.title}
          </h1>
          <article className='max-w-3xl mt-10 text-lg leading-relax text-ellipsis'>
            <MDXProvider>{ children }</MDXProvider>
          </article>
        </div>
      </div>
    </main>
  )
}

export default BlogPostTemplate;

export const query = graphql`
  query BlogPage($id: String!) {
    mdx(id: { eq: $id }) {
      tableOfContents
      frontmatter {
        title
        date
      }
      fields {
        slug
      }
    }
  }
`
Now please take note, there are 2 things you need to pay attention:
-
The graphQL query must come with a name. e.g.
query BlogPost, the query name is required for Gatsby graphql Typegen. -
For the property of
Queries.type, it must be the your query name followed by the wordQuery. For example, if your query isFruitData, then the type of PageProps isPageProps<Queries.FruitDataQuery>.
In this case, our page query name is BlogPage, the query type will be
Queries.BlogPageQuery. All the query types will be updated in src/gatsby-types.d.ts
automatically.
The blog page
GatsbyJS allowed user to programmatic aceess to the page creation and generate
blog pages. In root folder, we now create a file named gatsby-node.ts.
There are battery included API available to us in this file.
import { CreatePagesArgs, GatsbyNode }

const path = require("path");
const { createFilePath } = require('gatsby-source-filesystem');

// This is typescript, we are using `export const ...`
// rather than `module.createPages`.
// In Javascript, however, you're going to use
// the keywords `module.createPages`
export const createPages: GatsbyNode['createPages'] = async({
  graphql,
  actions,
  reporter
}: CreatePagesArgs) => {
  const { createPage } = actions;

  const query = await graphql<Queries.BlogNodeQuery>(`
    query BlogNode {
      allMdx (
        sort: {frontmatter: {date: DESC}}
      ) {
        nodes {
          id
          ields {
            slug
          }
          frontmatter {
            date
            title
          }
          internal {
            contentFilePath
          }
        }
      }
    }
  `);

  const postTemplate = path.resolve('./src/templates/blogPostTemplate.tsx');
  const createPostPromise = query.data?.allMdx.nodes.map((node) => {
    createPage({
      path: `blog${node.fields?.slug}`,
      component: `${postTemplate}?__contentFilePath=${node.internal.contentFilePath}`,
      context: { id: node.id }
      });
  });

  await Promise.all([createPostPromise]);

  if (query.errors) {
    reporter.panicOnBuild('ERR: Error occured while running GraphQL query.');
    return;
  }
}
A bit longer huh? Not yet finish, we still
need to make sure it create node based on all .tsx files.
Again, add this part into the bottom gatsby-node.ts.
// ↓ Add `CreateNodeArgs`
import { CreatePagesArgs, CreateNodeArgs, GatsbyNode }

// createPages
// ...

// ↓ Add `onCreateNodes` module
export const onCreateNode: GatsbyNode['onCreateNode'] = ({
  node,
  actions,
  getNode
} : CreateNodeArgs) => {
  const { createNodeField } = actions;

  if (node.internal.type === 'Mdx') {
    const value = createFilePath({ node, getNode });
    createNodeField({
      name: 'slug',
      node,
      value
    });
  }
}
and do not forget to include gatsby-node.ts in tsconfig.json.
At the bottom of tsconfig.json, in the "include" value list:
{
  "compilerOptions": {
    // ...
  }
  // ↓  Add this property
  "include": ["./src/**/*", "./gatsby-node.ts", "./gatsby-config.ts", "./plugins/**/*"]
}
Note that gatsby-node.ts and src/templates/blogPostTemplate.tsx must be made at the same time.
Otherwise the graphql Typegen will not works, by right the graphQL typegen will update automatically
when you save with CTRL + S.
Listing blog posts in a page
Now we are going to list down all the posts in /blog page.
In ./src/pages, create a new gatsby page blog.tsx.
import React from "react";
import { Link, PageProps, graphql } from "gatsby";

const BlogPages: React.FC<PageProps<Queries.BlogMdxQuery>> = ({ data }) => {
  return (
    <div className="max-w-3xl container relative mx-auto mt-10">
      <h1 className="text-4xl font-semibold mb-6">Welcome to blog page</h1>
      <div className="grid grid-rows-none gap-y-2.5">
        { data?.allMdx.edges.map(({node}) => (
          <Link
            to={`/blog${node.fields?.slug}`}
          >
            <div className="p-8 mb-6 rounded-md border-4 border-slate-300 border">
              <div className="max-w-lg relative flex flex-col">
                <h1 className="font-semibold text-xl md:text-3xl md:pb-5">
                  { node.frontmatter?.title }
                </h1>
                <p className="text-slate-400">✒️ Created: { node.frontmatter?.date }</p>
              </div>
            </div>
          </Link>
        )) }
      </div>
    </div>
  );
}

export default BlogPages;

export const query = graphql`
  query BlogMdx {
    allMdx(
      sort: {frontmatter: {date: DESC}}
    ) {
      edges {
        node {
          id
          fields {
            slug
          }
          frontmatter {
            date
            title
          }
        }
      }
    }
  }
`
Pff, we finally made it. Now navigate to 'localhost:8000/blog' in your browser. Make sure that there is no error messages in the terminal.
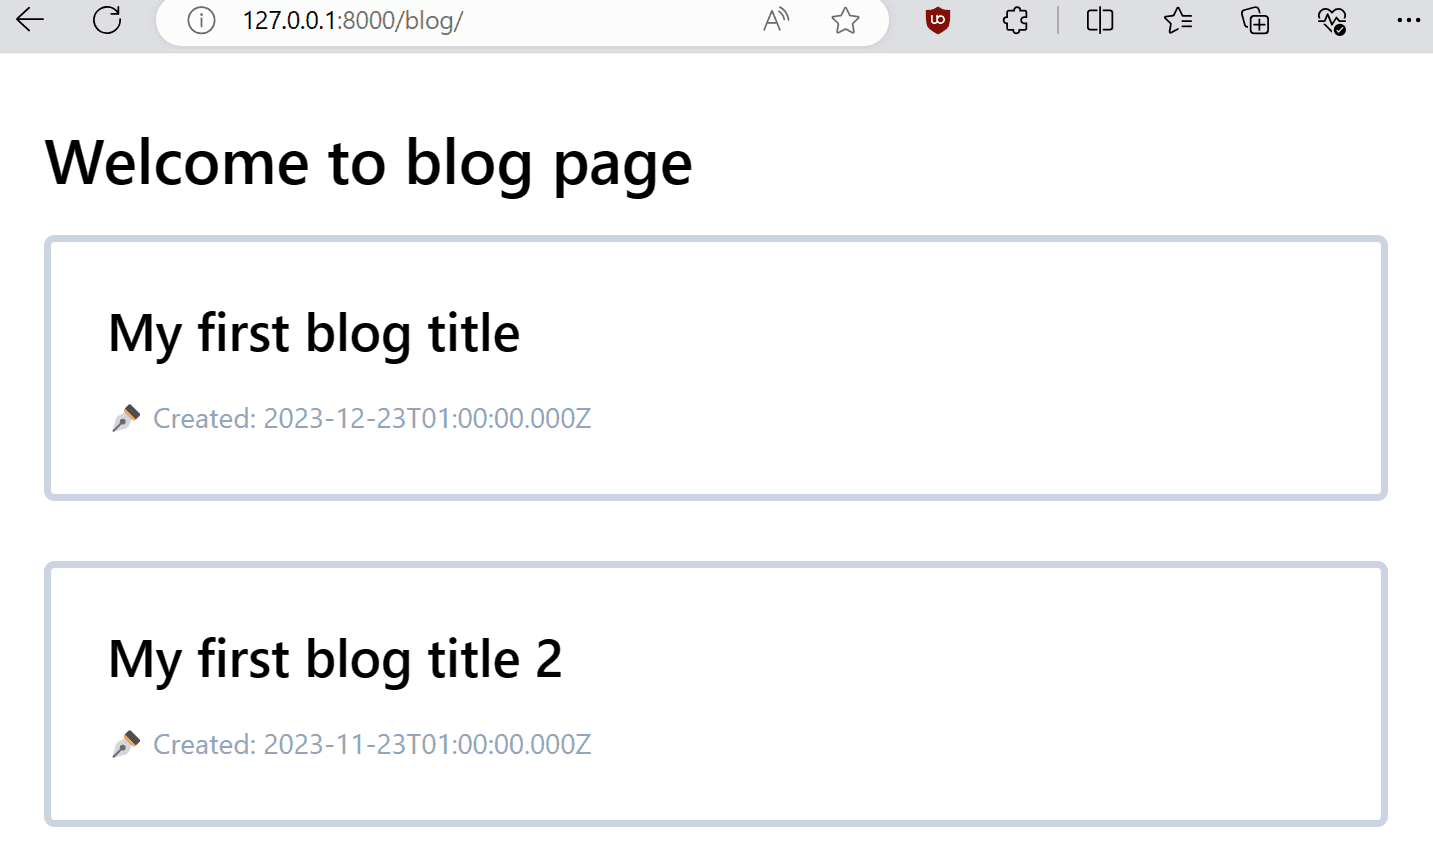
Now you can click on one of the post and view it.
Conclusion
We had learned how to create a basic MDX post template page in Gatsby 5. As we build the basic functionality of our blog, creating the blog post pages by fetching graphQL queries, and setting up the blog listing page. You may also want to do styling on your pages, and add SEO tag to each page for next steps. Unfortunately there is no much spaces for me to write here (as the famous mathematician Fermat said).
Thanks for reading tapir's first blog, please do not hesitate to reach out if you have any questions.